 Site Explorer
 Keyword tool
 Google Algorithm Changes
Google Webmaster Tools Guide
2
STEP BY STEP USAGE GUIDE FOR GOOGLE WEBMASTER TOOLS
TABLE OF CONTENTS
- 1. Set-up Your Google Webmaster Tools Account
- 2. Add Your Site
- 3. Check for New or Recent Critical Issues
- 4. Check for Manual Actions Applied to Your Site
- 5. Check for Crawl Errors
- 6. Enable Email Notifications from Google (Very Important)
- 7. Visualize Your Overall Search Traffic
- 8. Check for Security Issues
- 9. Basic Understanding of the Search Appearance of a Site
- 10. Analyze the Data
- a. Identify the Top Search Queries
- b. Identify the Top Pages (by search traffic)
- c. Identify the Top Pages (by Author Stats)
- d. Identify the Most Used Content Keywords on Your Site
- e. Who's Linking to Your Site
- f. Basic Backlink Analysis
- g. Advanced Backlink Analysis
- 1. In-depth Backlink Profiling
- 2. Download Links
- 3. Unnatural Link Identification
- 4. Disavow Links
- h. Understand your internal linking structure
- i. Understand your Google Indexation status
- j. Basic Google Indexation Analysis
- k. Advanced Google Indexation Analysis
- l. Googlebot Crawler Activity Analysis
- 11. Test Your robots.txt for Validity and Blocked URLs
- 12. Test How Google Sees Your Pages (Visually)
- 13. Test How Google Sees Your Pages as a Bot (Fetch as Googlebot)
- 14. Test Your Site's Speed Using PageSpeed Insights
- 15. Remove Unwanted URLs from the Google Index
- 16. Remove Unwanted Sitelinks (Demote Sitelinks)
- 17. Optimize the Way Google Indexes Your Site
- a. Improve Your HTML Structure Based on Google's Advice
- b. Ignore Specific URLs with Custom URL Parameters
- c. Use Data Highlighter to Improve Your Look in Search
- d. Set Your Site's Preferred Domain
- e. Set Your Site's Desired Crawl Rate
- f. Submit a Sitemap
- 18. Link Your GWT Account with Google Analytics for Better Insights
- 19. Misc
- a. Add Users
- b. Create a Custom Search Engine for Your Site
Set-up Your Google Webmaster Tools Account
First of all, you’re going to need a Google account. You won’t have access at the tools without it. You’ll need to go to https://accounts.google.com/SignUp and in a few easy steps you can sign up for an account. This will give you access to all the tools and applications of Google. You don’t need to have a Gmail account in order to do it. You may open it using your own email address.
Once you’re done with creating an account, you can log in and access Webmaster Tools http://www.google.com/webmasters/tools/.

Add Your Site
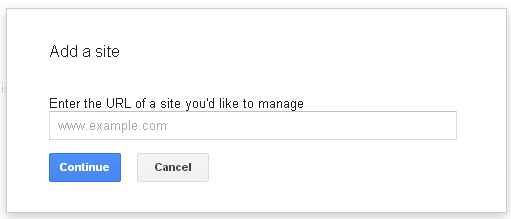
Since you’re already logged onto your account, you’ll be able to access the main page and you can add your website address by clicking the “Add a Site” button in the upper right corner, type the direction in the box and click “Continue”.

After that, you’ll be directed to the “Verify your ownership” page which prompts you with the request to authenticate your access to the added website. If you skip this step, your inserted site will be displayed on the main board, but it will be tagged as “Not verified” and you won't be able to access any data about it. You can verify your ownership through a couple of methods, verifying it via the Google Analytics being the easiest one. ( To be able to do this, you’ll need Administrator permission on the Analytics account ).
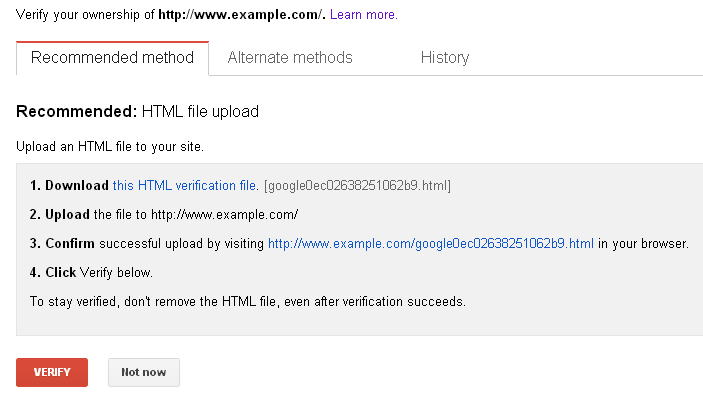
By default, Webmaster Tools will recommend to verify your ownership through the “HTML upload file” method. This is a more elaborate process, which involves downloading a specific html file offered by Google that you need to upload on your website, then accessing the link in a browser. After you’ve completed these steps you can hit the “Verify” button and you’re all set. If you want to keep being verified, you should keep that page inserted on your site.
If you completed this last step, everything is all set and you should be ready to access the site’s dashboard. You need to be aware that some data may not be available right from the beginning, and may appear after a few days, since it’s a fresh Webmaster Tools setup.
Check for New or Recent Critical Issues
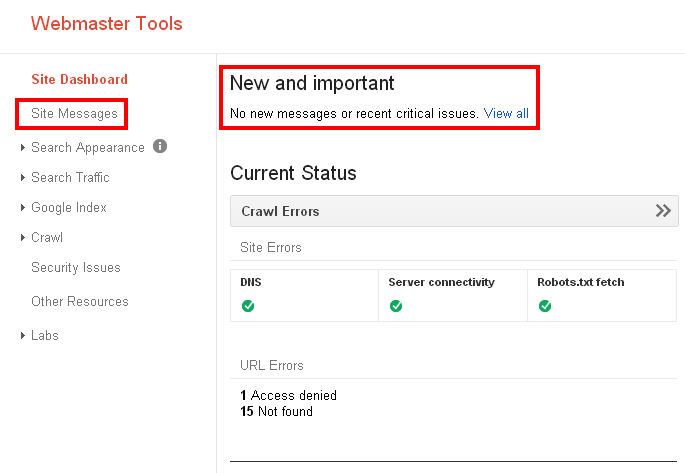
As we’ve previously mentioned, one important and typical usage of most GWT users is monitoring the “Site Messages” section. You may be alerted by Google regarding any problems it finds on your website, and it also sends certain messages that contain relevant information. The most recent messages or issues detected will be displayed on the dashboard’s main page under “New and important”.
Check for Manual Actions Applied to Your Site
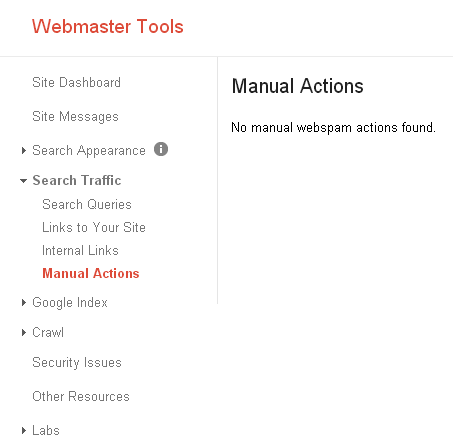
The second step, after checking the messages automatically sent by Google, would be to see if an employee from Google personally reviewed your site and found any guideline violations. While you are on the Webmaster Tools home page, you need to click on the site you want to investigate, then select in the left menu Search Traffic > Manual Actions. If you don’t have any actions taken upon your site, you’ll see the “No manual webspam actions found” message displayed.
You should be careful about these penalties, as they can destroy your site’s rankings. If indeed there are actions applied to your site, you will find them under one of the two possible categories: sitewide matches or partial matches. Furthermore, you’ll have details about the reason why manual actions were taken and the exact parts of your site that were affected. On the manual actions viewer you will have the option to request a review from Google, but we strongly suggest you should inform yourself regarding the latest Google’s guidelines before requesting a reconsideration.
Check for Crawl Errors
You can look at details regarding pages on your site which the Googlebot had problems crawling or which returned an HTTP error. Access this feature by clicking in the left menu on Crawl > Crawl Errors. The data, that is only displayed for the last 90 days, is split between two major sections: Site Errors and URL Errors. The first section is listing potential problems Google had, preventing it to access your entire site
URL errors, on the other side shows a complete list of specific links that Google had problems crawling. You have data split among two categories representing two types of Googlebots - Desktop and Smartphone for GoogleBot-mobile ( errors that do not occur on desktop ). Furthermore, you will be able to view graphics on two cases:
- a. Access denied - which represents the number of times that a problem with authentification occurs or the Googlebot is not allowed to access the site
- b. Not found - which simply means that the link points to a page that no longer exists
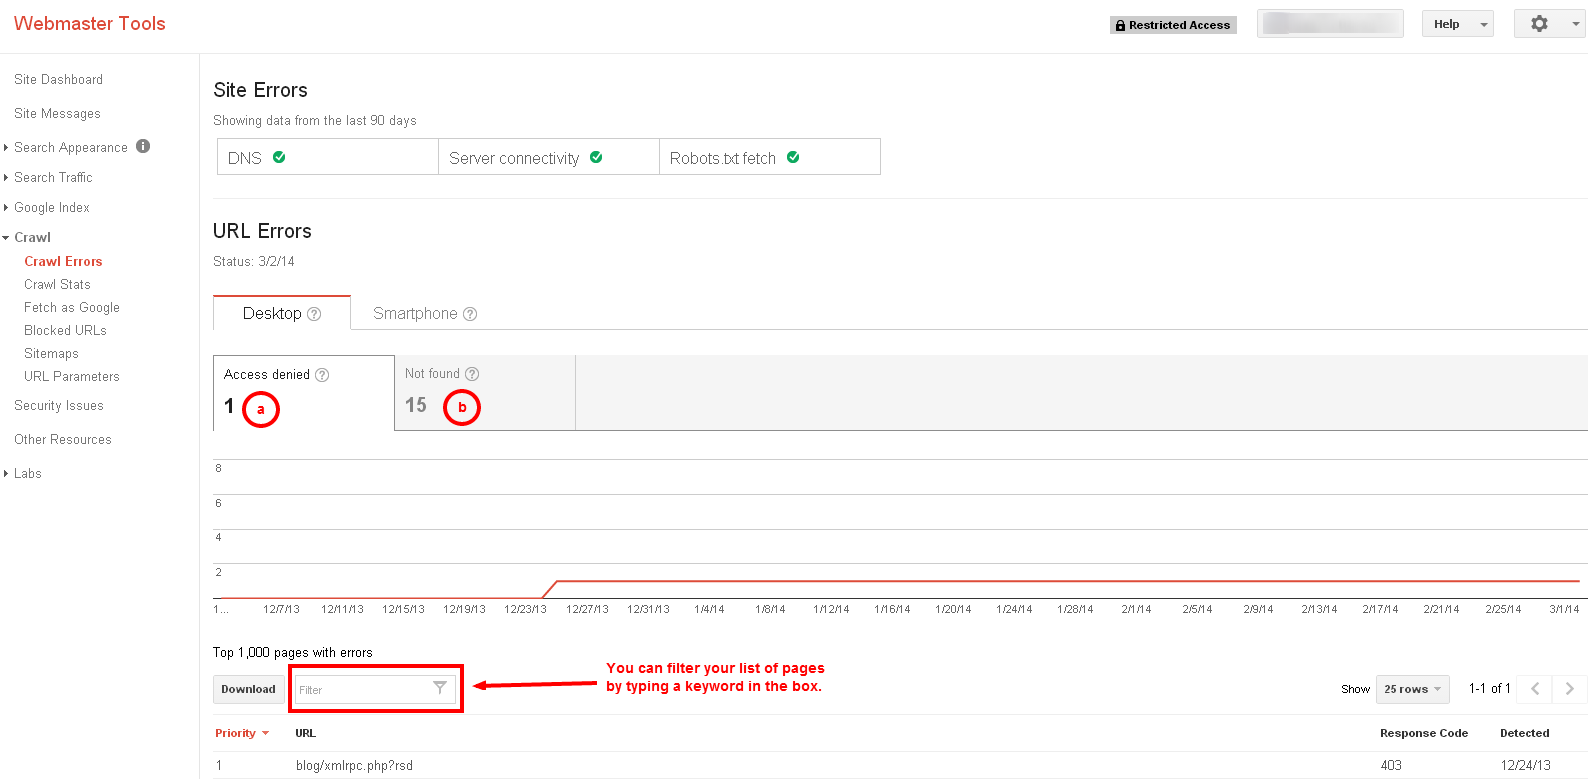
In the lower half of the page you’ll find a list with the top 1000 pages that contain errors, which are arranged by priority. You can also order the list by the response code the Googlebot received while trying to crawl the page (Response Code), or by the date in which these issues were detected.
If you feel there are too many pages with errors displayed and need to find a certain page, you can make use of the Filter box. You can type a word or a part of the word that is contained within the URL that you are looking for and it will automatically display only the links that include it.
Enable Email Notifications from Google (Very Important)
It may be the instance that Google sends you a message about certain errors it discovered, on your site. The most recent ones will appear on the GWT home page, but there’s another option that you can use in order to stay vigilant at all times.
This helpful option has to be activated by linking your personal email with the Google account. In order to do so you’ll have to:
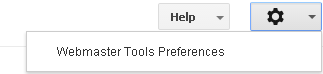
- a. Go to the Webmaster Tools main page and click on the gear icon located in the top right corner of the dashboard.

- b. Select Webmaster Tools Preferences
- c. Under Email notifications, check on the box right in front of “Enable email notifications”.
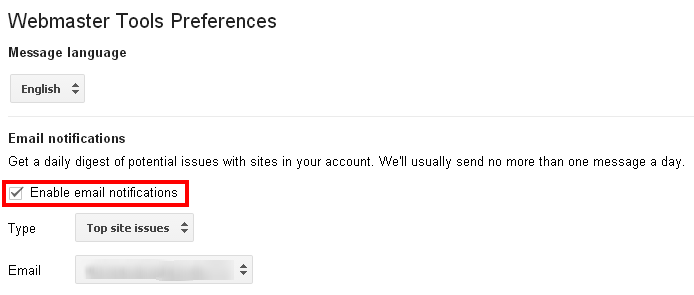
While in the Email notifications menu, you can select the type of issues you wish to be alerted about and the capability to select the email, where you want to receive the messages.
Visualize Your Overall Search Traffic
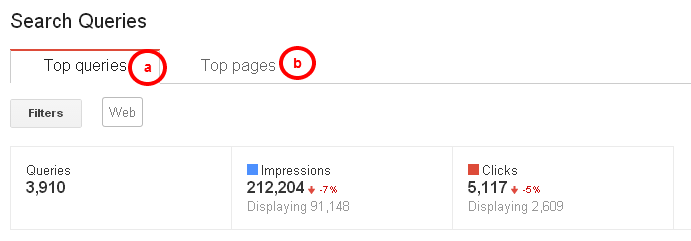
Google Webmaster Tools provides accurate data regarding the number of impressions, clicks, click-through-rate and average position. The feature that helps you view all this data is called Search Queries and you can reach it in the Search Traffic category in the left menu The data is split into two main categories:
- a. Top Queries - which attends to the top keywords used by visitors to reach your website.
- b. Top Pages - which gives you detailed information about the pages from your site that perform well in the SERPs. For this category you can hover your mouse over the link and you’ll get a pop-up image of that specific page.
In this tool you’ll be able to see a graphical view of the Impressions (1) and clicks evolution (2) but also a list with all the search queries/pages and the metrics that are being monitored.

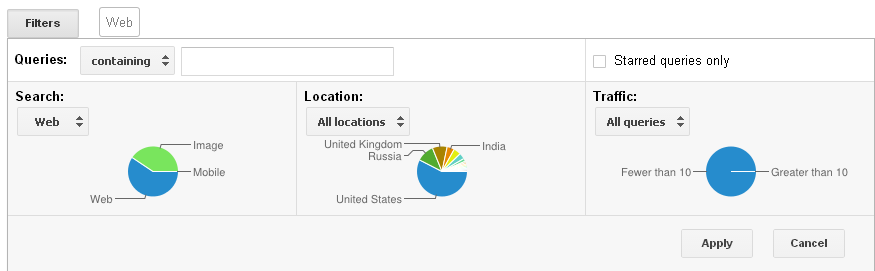
You can also use the filter button to personalize the data based on the platform used for the Search (Web/Image/Mobile/Video), by Location and by Traffic (queries with more than 10) impressions/clicks.
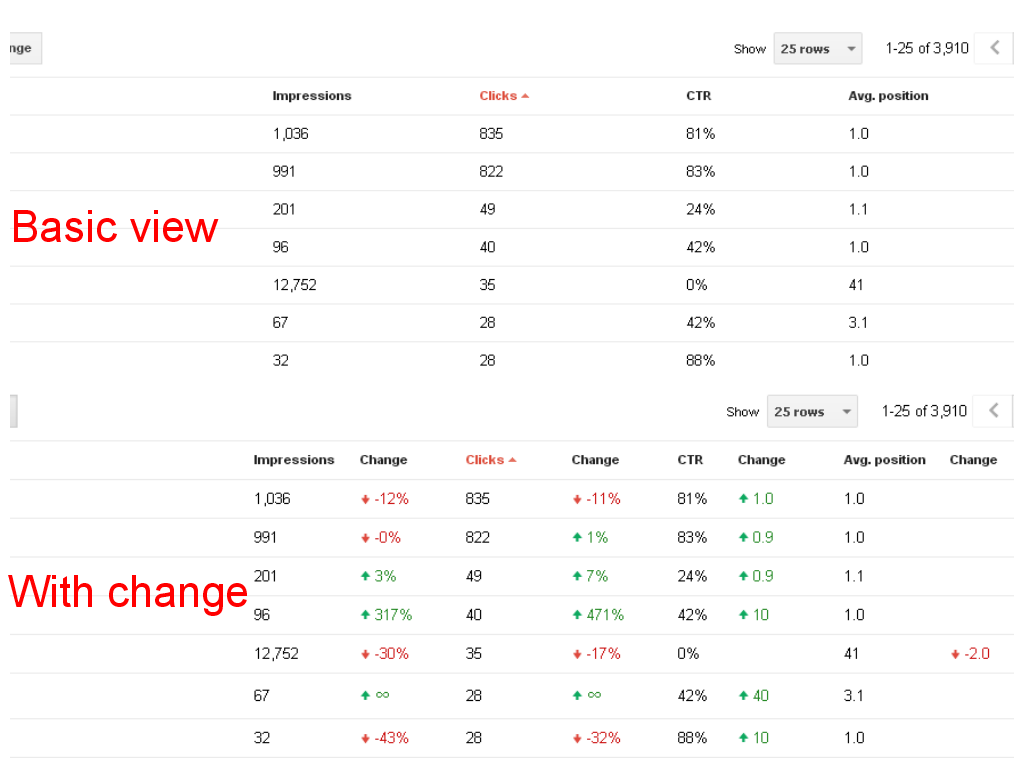
The table of queries can be seen in both basic view, and advanced view. The last option shows you changes occurred for all four metrics ( impressions / clicks / CTR / avg. position )
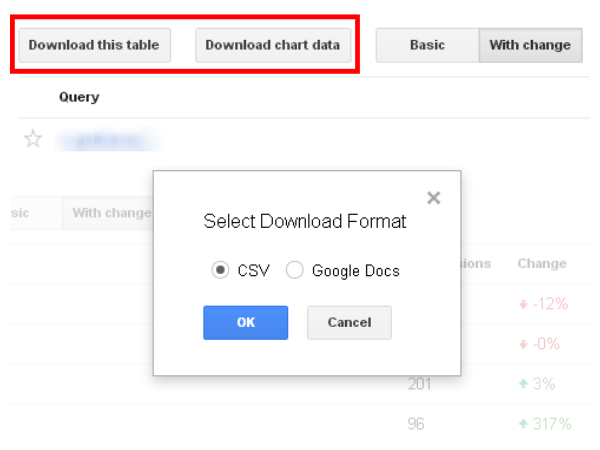
In order to exploit this data to the maximum you can download the table or the chart data in a CSV or Google Docs file.
Check for Security Issues
There is a different section on Webmaster Tools called “Security Issues”, created by Google to announce its users in case of possible security problems a website owner may have. You may be alerted if your site deals with issues like hacks, SQL injections, content injections, malware code injections and so on, as well as suggestions on how to address these problems.
With the information put at your disposal in this section, you’ll be able to quickly detect the source of the problem, repair it and then submit a review request.
Basic Understanding of the Search Appearance of a Site
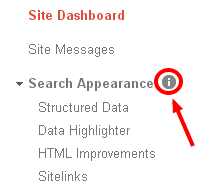
Regarding the ways in which Google displays your page in search results, there may be an overwhelming amount of details. One can sometimes feel lost in the sea of specialized terms, so Google created a pop-up window in front of the “Search Appearance” button situated in the left menu.
Here you’ll have different examples portraying elements of the search results page
You can use this window to get an idea on how your page might look in the SERPs and inform yourself about the decisions you need to make in order to optimize your appearance in those elements.
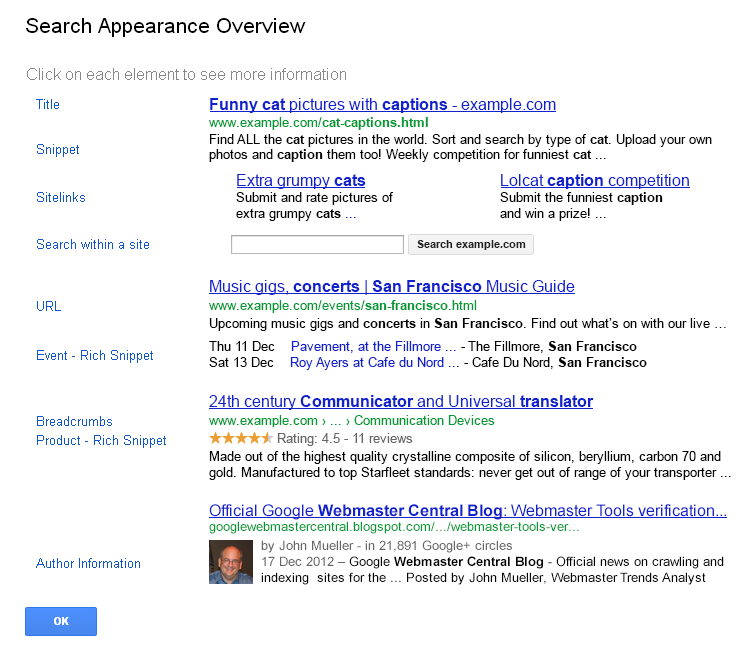
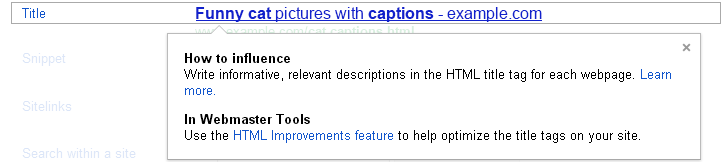
There will be essential information regarding snippets, title, sitelinks, URL’s and so forth. Clicking on any of these elements will reveal a snack fact structured in two parts:
- How to influence - gives you an insight on what you can do to influence that certain element.
- In Webmaster Tools - shows you links to certain instruments that may be of help in your pursuit of changing the appearance of your site in search results.
Analyze the Data
With all these data at your disposal you can do some interpretations and analysis to find out more information regarding what measures you can take to resolve issues and improve performance.
a. Identify the Top Search Queries
The analysis should begin with enquiring the information from the Search Queries viewer, that you can find in the Search Traffic section in the left menu. The tool can be used to keep an eye on the evolution of certain keywords in search results that have one or more of your website’s pages displayed. The data provided in this feature is from the last 90 days. On this page there’s a graphic evolution of Impressions and Clicks. If you’re going to click anywhere on the graphic there’s going to be a pop-up displayed, giving you information regarding these two measured metrics at a certain point in time.
In the “Search Query” area you’ll be able to monitor four metrics:
- Impressions - displays how many times a page from your site appears in SERP;
- Clicks - displays how many times a person accessed your website’s listing for a certain inquiry;
- CTR (click through rate) - displays a percentage of impressions that lead to a click to a page from your site;
- Avg. Position - displays the relative top rank in the search results for a certain query.

In the top left corner, there’s a Filters button that gives you a plentiful amount of options to play with in order to gather the best insights from your data. By default they are all set to show you all data, but you can personalize your statistics:
You can filter by:
- 1. Queries that involve ( or not ) a certain keyword
- 2. Starred queries
- 3. Queries selected for certain media. Here you’ll have a drop-down menu so you can choose from images/mobile/video/web
- 4. Queries selected by location
- 5. Queries that gathered more than 10 impressions/clicks
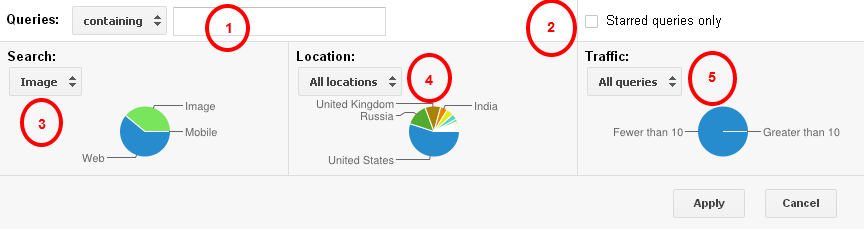
After you’re done setting up the personalized filtering options hit the Apply button.
You can also personalize your data by specifying to show the data in “Basic” or “With Change” view. By choosing the last view you’re going to have a detailed keyword table showing the changes they suffered on every metric. Furthermore, you can click on a keyword for a more in-depth view of a personalized graphic and a display of the pages that it’s found on. This detailed view gives you all the details about the query, and the most efficient pages you have for that keyword.
b. Identify the Top Pages (by search traffic)
We remain in the “Search Queries” section, but we will focus our attention on the tab next to “Top queries” named “Top Pages”. Here you’ll find the same graphic and the same filters, but instead of keywords, you’ll have a table with all the pages of your website ( which are analyzed by the same metrics as the queries ).
As a final note, all this queries and page data can be saved and downloaded as CSV or Google Docs format.
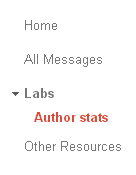
c. Identify the Top Pages (by Author Stats)
A difference between the data displayed by Author Stats and the one found in Search Traffic is that, here, you’ll be monitoring only those pages for which you are a verified author. In order to have access to this data you need to set up your authorship by connecting your Google+ account to your content. Otherwise, when you’re going to access “Author Stats” you’re going to see the message No data available. This feature uses the same filters and the same metrics as “Search Traffic”.
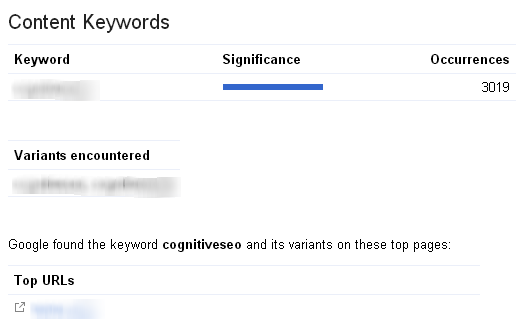
d. Identify the most used Content Keywords on your site
Valuable information regarding the keywords you use in the content that you create, will be found in the Content Keywords section of the Webmasters Tools. By browsing the menu in the left, you can go to Google Index > Content Keywords and find all the keywords used on your site ordered by their significance.
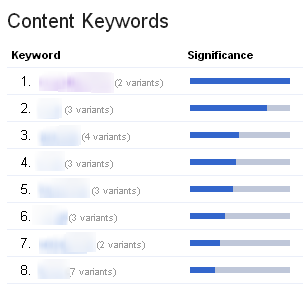
You can click on those keywords for a detailed look on their occurrence on the website, different variants of the keyword encountered and also Top URL’s which contain this certain keyword.
This specific feature may contain information about your site’s content keyword concentration. From this data you can figure out if your site is going in the desired direction. If you’re going to find unknown keywords with high significance or if you won’t find the desired one among the top, then you might have a problem.
e. Who’s linking to your site
There must be a constant watch over your own site and pages, but you also need to keep an eye on other sites that link to your site. For this purpose only, you can access Links to Your Site, found in the Search Traffic category. With the help of this link viewer, you can see an overall number of links, what websites link the most and what pages from your site are most linked. For every website that links to you or for every content that gets linked you’ll have an estimate number of times.
In the lower part of this feature, you have a list with all the tags used to describe the links to your site.
For a more detailed analysis of your backlinks, try the professional tool by cognitiveSEO, which is accompanied by case studies and an array of resources.
f. Basic Backlink Analysis
The simplest form of viewing the data will be found on the main page of the “Links to Your Site” feature. From here you have access to some basic knowledge about other websites that link pages from your site. Regarding the data available in this basic form, it can be broken down into 4 main areas of interest:
- The number of total links to your site
- A list with the websites that have the most links to your site and the number of links
- A list with the most linked pages on your website and the number of links
- A list with the anchor texts used for linking to your site.
g. Advanced Backlink Analysis
1. In-depth Backlink Profiling
If you need a more detailed view of the situation in the “Links to Your Site” section, you’ll want to use the “More” link that is found at the bottom of the “Who links the most” and “Your most linked content” lists.There you’ll have displayed a long list with the top 1,000 domains/linked pages, in contrast to the basic analysis where you have only a list of 5 elements.
For the “Who links the most” category you will have at your disposal the full list of domains that have links to your site. You can order these domains by the number of Links or the number of Linked pages. In the top right corner you have a button which lets you choose how many domains should be displayed on a page, which is set by default to show 25 rows.
If you wish to see all the linked pages from your website, you need to click the “More” link at the bottom of your “Your most linked content” list.


2. Download Links
The main reason as why you should care about downloading a list of links is that you can use it for disavowing harmful links that you couldn't remove or to keep a track on when you obtained and when GoogleBot crawled the new links, due to the fact that Google timestamps those links.
To get a detailed list of links from your site you have to:
- Go to the GWT main page, and select the site you want
- From the Dashboard, go to Search Traffic > Links to Your Site
- Under the Who Links the most shortlist, click More
- Here you can choose to download three variants of the list:
-
- 1. Download this table - which is an exact replica of the online table of pages
- 2. Download more sample links -- which gives you a sample of links
- 3. Download latest links - a list with the latest links and the date at which they’ve been indexed
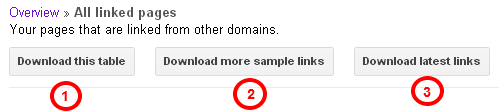
- That way, you’re going to have a CSV file with all the latest links Google crawled for your site and the dates on which they were created.
3. Unnatural Link Identification
Unnatural links are a dreaded plague! One with which you don’t want to come in contact. If you happen to be announced by Google via the Manual Actions page, it’s not a good sign. That means some links pointing to your site have been detected as artificial or malicious.
The result may be a manual action taken against your site that renders your site obsolete. As a solution for this problem, Google recommends that you go to the Links to your site and download the list with all the links. Then you need to check all the links in the list for guideline violations and ask site webmasters to remove the faulty links or to disavow those links.
This process of browsing through so many links may be laborious and painful and finding the rotten links may take a long period of time ( in which your website drops from search results ). To shorten this period of time you can use third-party tools to speed up the process of finding andremoving/disavowing unnatural links.
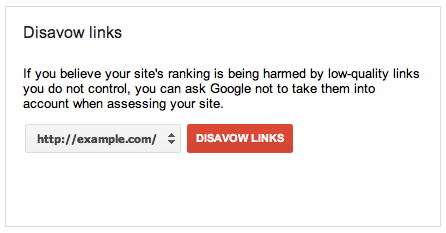
4. Disavow Links
Disavowing links helps you to, among others, remove penalties given via manual actions. If you submit a disavow request, Google will handle those links the same as if they were tagged nofollow.
To disavow a list of links you need to access the disavow tool and:
- Select your site from the dropdown menu
- Click on the “DISAVOW LINKS” button
- Click Choose file ( the list with the links you desire to disavow )
h. Understand your internal linking structure
Managing your internal links is one of those tasks that sometimes gets overlooked. This Webmaster Tools component gives you a overall view on how your internal link structure is constructed. Google believes that the pages on a website should be connected to each other. In the Target Pages section of Internal Links, you should have your most important pages, with the highest amount of links.
You can also particularize your Target Pages list by using the “Find internal links” feature embedded at the top. You’ll have a more detailed view of certain pages:
i. Understand your Google Indexation status
While handling this Webmaster’s Swiss Army Knife, you’re going to have to have a constant lookout on the data provided about the number of links from your page Google was able to crawl and index. You’re going to find all those information gathered into one feature, the Index Status. In order to reach this viewer, you need to look into the Google Index section from GWT.
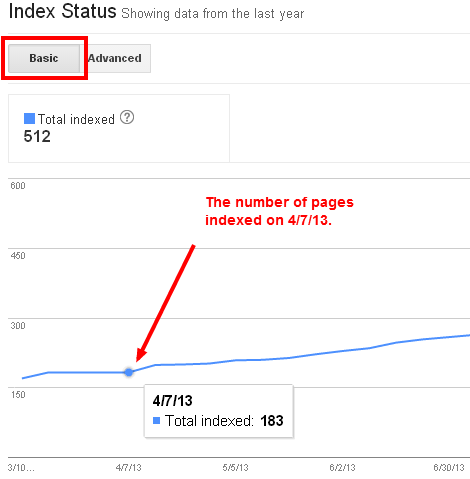
j. Basic Google Indexation Analysis
In the basic version of Index Status you have a graph displaying the number of pages from your site that have been indexed by Google. You can hover where you want on the “Total Indexed” graphic to view the number of URLs indexed in a certain period of time. This number can fluctuate as time passes and pages are either added or removed from the site.
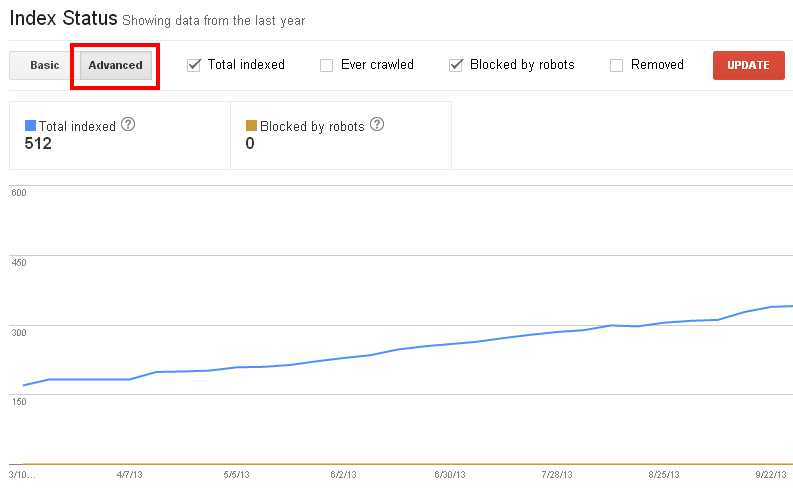
k. Advanced Google Indexation Analysis
To see an advanced version of the Index Status you need to click on the Advanced button. Here you’ll be able to check the boxes for the data you want to be displayed and then click Update. A variety of options from which to choose are at your disposal:
- Ever crawled: A total number of links that the GoogleBot has crawled in all your site’s history
- Blocked by robots: This number represents all pages Google was denied access through the disallow feature in the robots.txt file
- Removed: A number of removed URLs from search results as a consequence of URL removal request.
l. Googlebot Crawler Activity Analysis
Besides informing yourself regarding the URL’s that the GoogleBot couldn’t crawl or pointed to non-existent pages, you can also monitor the activity of the bot on your site in the last 90 days. The information displayed is gathered from all sorts of content types that Google downloads, like CSS, JavaScript, Flash, PDF and images.
If you don’t really know how to really benefit from this feature, you should know that you can use the graphics to view how many pages from your site are crawled (a), kilobytes downloaded (b) and how fast the GoogleBot crawl your pages (c)
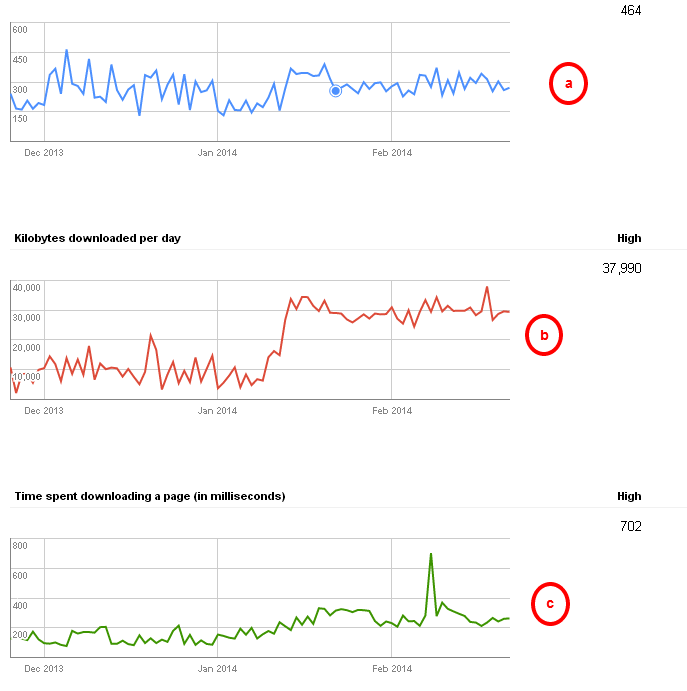
For optimal performance, you’ll want to have the time spent downloading decrease and the number of pages crawled per day increase. Also be on the lookout for heavy fluctuations as these may indicate some problems.
Test Your robots.txt for Validity and Blocked URLs
This powerful tool called Blocked URLs is meant to respond to a couple of questions:
- You can view the number of URLs your specified robots.txt file blocks from being crawled.
- You can change your file to block certain pages and test how the GoogleBot reacts and how it affects your site.
You need to be careful changing settings though, because too much change may drastically affect how Google indexes your site.
In order to write content for your robots.txt file you’ll need to know about two major things:
- user-agents: the specific GoogleBot(Normal,Mobile etc) to which the rule applies to
- disallow: the page you want to block from being indexed or crawled.
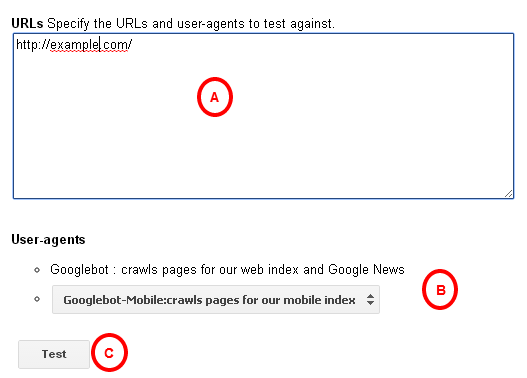
These two are considered parts of the same entry. You may set an entry for certain bots like GoogleBot, GoogleBot-Mobile and GoogleBot-Image or for all bots ( by putting an asterisk ). Here’s an example of an entry that addresses all Googlebots:
- User-agent:*
- Disallow: /page1/
After you’ve specified your URLs (A) and the bots you want to test against (B), you can hit the Test button (C).
Test How Google Sees Your Pages (Visually)
The omnipresent entity called Google sees everything and keeps a record of everything it sees. It’s the case with the visual representation of your site. In the Instant Preview tool, which you can find by clicking in the Webmaster Tools menu on Labs you can compare one of your indexed pages with the ones in Instant Preview. You just have to search the full link in the search box placed at the top of the page and hit the “Compare” button. Most of the images provided are instantly generated when GoogleBot crawls your content. If there’s no preview provided ( it may happen if there are crawling errors and your site can’t be accessed ), you may make a request to Google to create an on-the-fly preview of your site.
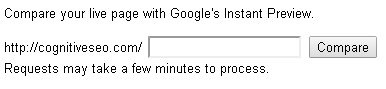
While Webmaster Tools is processing your input, in front of the inputted URL you’ll have a “Pending” message. All the inputted pages may receive a status message that could be “Success” in case it didn’t find any issues, or “Error” if it stumbles upon serious issues while rendering.


To see more details about the page that you just compared, click on the status message in front of the URL. On this detailed view you’re going to have details about:
- The URL
- The date at which the comparison was made
- 3 instant previews: On-demand Desktop Search / Pre-render Desktop Search / Mobile Search
- A drop-down list with the errors that GoogleBot encountered while fetching
- Other possible reasons suggested by Google regarding the differences between the instant preview pictures displayed above.
Test How Google Sees Your Pages as a Bot (Fetch as Googlebot)
An indispensable resource in Webmaster Tools is called "Fetch as GoogleBot" which enables you to send an URL and see how Google’s web crawler processes it. You can see first-hand what happens with that URL, for example, if GoogleBot has issues with reading the content. You can help yourself and Google by submitting links that are new and updated to be indexed.
If you wish to proceed onto submitting your links, go to Crawl > Fetch as Google, enter the URL in the dedicated box and click FETCH. After you’ve successfully fetched the URL you’ll see another link appear on the screen, named “Submit to index”. You will then be prompted with a message box asking you if you’d wish to select only the URL or you wish to submit it with all its links. There are limits to the number of pages submitted:
- When it’s about particular URLs, you can submit up to 50 a week
- When you're submitting URLs with all the linked pages, the maximum limit is of 10 per month
Using this method, the process of crawling is done in 24 hours, and it will then be automatically qualified to be indexed by Google. Even if everything is done by the book, and it goes well, you won’t have a warranty that these submitted URLs are going to be indexed. Google is going to process the link in the same way as it does with the URLs discovered automatically.
This tool is meant as a way of providing a quick and exact reassurance of your page’s validity and a swift indexing, and it’s not meant as a way to index every new and updated page in your site. GoogleBot is very accurate at crawling sites and finding pages to index, so you shouldn’t stress about abusing the Fetch button.
Test Your Site's Speed Using PageSpeed Insights
Long website loading times are a big turn-off for visitors and you should attend to this problem (if you have it), even if it represents a small concern on your agenda. Greatness comes from attending small details. You can use the PageSpeed Insights feature to figure out suggestions on how to decrease loading times for all devices. By addressing this issue you can influence conversion and bounce rates.
To profile a website with this tool, you need to go to the left menu and click on Other Resources and then click on the PageSpeed Insights link from the table. All you have to do after that is to insert the URL of the page you wish to evaluate into the box and hit ANALYZE.
Practically, what this tool does is that it processes and evaluates the page to see if it’s in conformity with a couple of rules of website performance. Google also provides ample documentation for every rule, so you’ll know how to deal with any suggestion generated. For both device categories - Mobile and Desktop, PageSpeed will display a score number and a color scheme ( red/yellow/green ). Under each category you’ll have suggestions made for Speed and User Experience. All the data is cached for 30s, so if you wish to re-test after making some changes you should wait 30s.
If you worry you don’t have a lot of experience correcting the issues, don’t worry! For every suggestion displayed you’ll have a “Show how to fix” button which gives you plenty specific explanations. These straightforward advices are very useful for everybody, webmaster wizards and new learners alike.
For an on-the-spot page analysis and also for sites that require a login, you can use the browser extension for PageSpeed.
Remove Unwanted URLs from the Google Index
There are two ways in which a page can disappear from the search results - a webmaster can specifically request a hasty removal or Google may take actions. If one page suffers modifications or is being removed, it will automatically lose it’s ranking and you don’t need to do something in particular to make that happen.
The express removal requested by the user can be done by creating an entry in the robots.txt file to specifically tell user-agents to ignore that part of the site, or you can go straight to Remove URLs in the Google Index section of the Webmaster Tools menu. Next you need to click on New removal request and then type in the address of the page you want to remove from search results, and then hit the Continue button. Be sure to use exactly the same characters and elements that are on the site, or else it might not work. After this process, you just need to click Yes, remove this page and then submit the request.
Be sure to take actions to completely remove the page from your site, because the removal request will only be active 90 days. After this period GoogleBot will crawl your page and index it all over again. To make sure the content of that page doesn’t end up in search results again, you may take the following actions:
- Remove that individual page from your site
- Use robots.txt to block GoogleBot from accessing the page
- Add a meta noindex tag on the page.
Also, an interesting fact about Remove URLs is that you can also request the removal of content from other sites. A couple of factors can lead to this action:
- Legal removal request
- Removal of personal information - if you have concerns regarding particular info
- Content that’s not live.
Remove Unwanted Sitelinks (Demote Sitelinks)
Firstly, what are sitelinks ? These types of links are like a bonus, additional pages added on the SERPs for a certain site. Normally, when someone searches something using brand keywords that Google knows for sure the site is listed on the number one position organically. To give you an example, you can type in the search bar “cognitive seo” and you’ll see that under the link to cognitiveseo.com you’ll have a list with the most relevant links to certain pages from the site.
It helps the people that searched for that brand keyword to move around easily on the site. And, of course, it helps in establishing your brand. These sitelinks are only becoming annoying for a webmaster in the moment they don’t display the pages you want your visitors to focus on, and Sitelinks Demotion shines it’s light upon the problem. From your Webmaster Tools account, you can access it by clicking Search Appearance>Sitelinks. You can either use this option when the sitelink list is incorrect or is not according to your wish and it won’t guarantee you that the demoted URL will never be displayed in that listing ( but it’s a clear statement that you don’t wish that the demoted URLs should appear in sitelinks ).
The process is simple and it requires only a few, easy steps. While on the Sitelinks Demotion page you have to:
- 1. Go to “For this search result” field and type in the desired URL to which the sitelink list belongs
- 2. In the “Demote this sitelink” area type the address of the link you want to demote.
I have to remind you that Google doesn’t specify that demoting guarantees an instant replacement, so you’ll have to wait around and see if it takes effect. Also, this tool can be used to demote up to 100 links, and their effectiveness wears off after 90 days.
Optimize the Way Google Indexes Your Site
a. Improve Your HTML Structure Based on Google's Advice.
For benevolent webmasters, the “URL Parameters” tool enables them to help both, themselves and Google. You can help GoogleBot find it’s way around the site and crawl efficiently, but be advised, the settings on this feature are powerful and may alter the outcome of your site on the search engine. You may end up telling Google that essential pages on your site are blocked they might end up being left out of the search results.
One problem that you can avoid by using URL parameters would be to give Google information regarding pages with duplicate content. That way, it will make crawling and indexing pages with the same parameters more efficient.
Usually, you’ll have to types of parameters:
- Parameters that don't change page content, which are used to track visits and referrers. They don’t influence the content of a page whatsoever, and usually, all links point to the same content
- Parameters that alter the content on the page.
To handle these parameters, you first need to access the tool which is situated in the Crawl section of the Webmaster Tools menu. The next step is to search for the parameter you want to change ( if the parameter ain’t in the list, go to “Add parameter” ) and hit the “Edit link” which is situated next to it.
b. Ignore Specific URLs with Custom URL Parameters.
The smart GoogleBot knows how to read your site and knows what to do with the data he gathers, in most cases. Sometimes it’s best that you “teach him” about the structured data on your site so that you can show the bot what is important for you. The “Data Highlighter”, as you can see from it’s intuitive title, does just that. It’s basically a point and click tool to tag data from your site so Google will know how to package the data in a more attractive style in search results.
If you’ve got event listings on the site, the “Data Highlighter” will help you by tagging data like name, locations, reviews and others. Google uses this data to create rich snippets on the search results pages. An important fact to be mentioned is that, in this tool, you can only work with pages that Google has crawled recently.
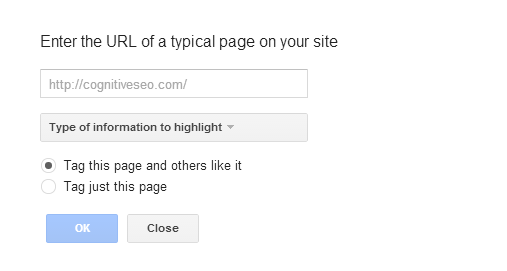
With that in mind, if all requirements are met, you can start highlighting data from your site. The tool is situated in Search Appearance >Data Highlighter. Once on the feature’s page, you hit the Start Highlighting button and you are prompted with a menu where you need to specify:
- The link to a page on your site
- The type of information you want to highlight and extract
- Select if you want to create a page set containing a single page or multiple pages.
Once you’re finished with this process, on the Tagger page, start tagging data by selecting content with the mouse. When you select content, a pop-up menu will be shown, where you have to select the type of data you want to display.
c. Use Data Highlighter to Improve Your Look in Search.
Google can use structured data to create rich snippets and features for the search results. You can help with the process by specifying the structured data from your page. You can go to schema.org or by using Microdata and RDF formats, or you can use the point and click feature “Data Highlighter”.
The “Structured Data” page, found in the Search Appearance menu, displays the knowledge Google learned about your site or errors that may block rich snippets from being displayed. You will receive information regarding the number of pages from the site that contain structured data, how many type of data items are on your site, which of the data items have errors and a list with the data types that have the most errors, so you can quickly fix the issues.
d. Set Your Site's Preferred Domain
We explained in the “Set the preferred domain for your site in the Google index” why it’s important for you to specify the preferred domain for your website, so we won’t linger too long on that.
To be able to set your preferred domain you need to complete the verification process for both domains inputted in Webmaster tools, or this option won’t be available to you. Now, that you’re done with that you can go to the gear icon in the top right corner and select Site Setting from the drop-down menu. In the Preferred domain section, you just need to select the variation you wish to pick.
e. Set Your Site's Desired Crawl Rate
The speed of GoogleBot can be manipulated and set at a desired page, but it won’t affect when it crawls or how elaborate the crawling can be on the site. The algorithm conceived by Google assesses the site and decides how deep it has to crawl the site. The goal is to analyze as much of the website as possible in one visit without affecting the loading times of the site, and hinder the server’s bandwidth. You don’t want to have your server encumbered by GoogleBot’s crawling. You also don’t want to modify something like this without recognizing some problems that GoogleBot produces while accessing your site too often. You can modify the crawl rate ( time spent by GoogleBot on your site, crawling ) by following these steps:
- On the Webmaster Tools page, select the site on which you want to make the change
- Click on the gear icon and select Site Settings from the drop-down menu
- In front of Crawl Rate, you can select the setting that you wish
The set crawl rate will come in effect and be valid for 90 days. Good to be specified that the crawl rate can be set for sites that are on site level - www.example.com or subdomain.example.com.
f. Submit a Sitemap
Sitemaps help search engines categorize and move swiftly on your site. Submitting a sitemap to Webmaster Tools is a quick and painless process:
- Click on a verified site from the list on Webmaster Tools main page
- From the left menu, select Crawl > Sitemaps
- In the Sitemaps tools, click on the TEST SITEMAP button
- Insert /system/feeds/sitemap in the box
- Click Submit Sitemap.
Link Your GWT Account with Google Analytics for Better Insights
Like we’ve mentioned in “Get better insights in Google Analytics by linking it to GWT” you can still produce some valid keyword data from linking your Webmaster Tools account to Analytics. To be able to see the GWT data in GA reports you need to:
- on the Webmaster Tools main page, click on the Manage site drop-down menu in front of the site you are interested in, and select Google Analytics Propriety
- Select the propriety you are interested in and click Save.
You can link a site to only one web propriety. If you try to create another link, it will overlay the previous association.
Misc
a. Add Users
Site owners or full users can view all the features, have access to all the actions from the tools like demoting sitelinks. Only site owners can add or remove users and they can restrict users to from accessing certain functions from Webmaster Tools.
- Select the desired site from the home page
- Click on the gear icon and select Users & Site Owners
- Click Add a new user
- Input the email address and select the level of permission for the user you wish to add
- Click Add
b. Create a Custom Search Engine for Your Site
It’s not only a custom search bar for your site’s users, it’s a Google-powered custom experience that helps those who end up on your site. This Custom Search feature can be used for one or more sites, and can be found in the Other Resources category from the Webmaster Tools menu.
If you wish to create a new Custom Search Engine you need to:
- Add URLs in Sites to Search. In these boxes you can input the sites you want to add to your CSE, on which the searching will be done. You can add an individual page ( www.example.com/page.html ) or an entire site.

- You can specify the language
- You can set the title of the custom search engine
- In the Advanced Options you can restrict pages from the inputted site pages to those that contain Schema.org types. You can input up to ten schema.org types in the list.
- After you’ve done everything, click the “Create” button.
- Validate the structured data contents of an HTML email
To tend to your needs related to markup and verifying structured data collected from documents, Google created a tool called Email Markup Tester. Emails are an important part in one's life - you communicate, you plan events. These electronic letters contain a lot of information, and as a consequence, they need to be responded to. When you’re attaching markups from schema.org to emails you send to users, it will make it easy for them to take swift action.
This Webmaster Tools feature, situated in Other Resources > Email Markup Tester is intuitive. To use it, you just need to paste the markup in the text box and then click the “VALIDATE” button. Creating Your First Email Campaign Strategy will be the next step.